Pop-up Puppet How To: A Step-by-Step Guide (that you can follow even if you’re not crafty!)
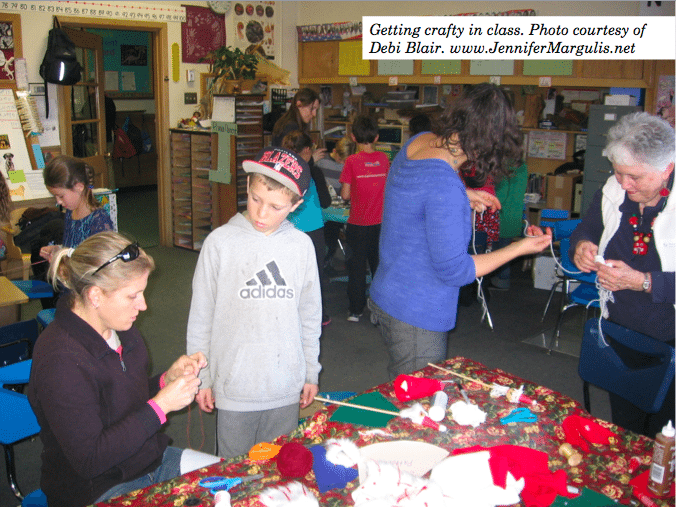
We had a crafternoon at my son’s school this week. Lynn Fain’s second and third graders joined Debi Blair’s fourth graders. The door between the two classrooms stayed open and both rooms were set up for fun. With hot chocolate and caramel apples thrown in.
The holiday crafts ranged from snow globes to pine cone owls to making a pop-up puppet.
I’m not crafty.
I can’t sew a straight line.
I may not even know how to cut a straight line.
But I volunteered to teach the kids how to make a pop-up puppet.
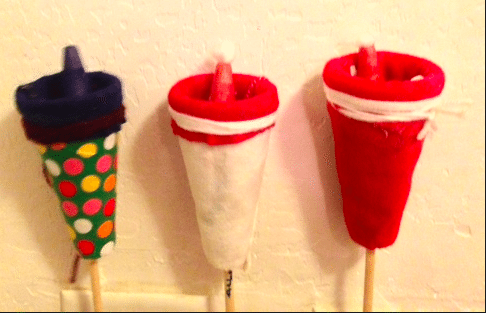
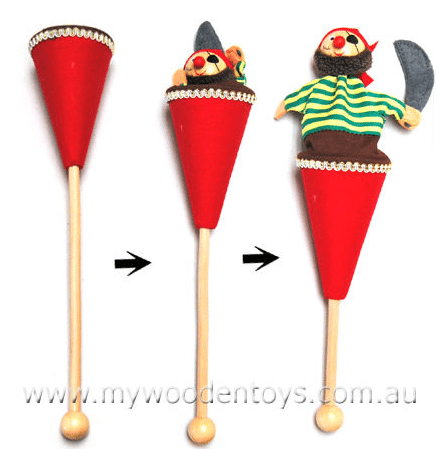
The pop-up puppets hide like this:
Then you take your pop-up puppet and pop it up!
Some children decided to make pop-up puppet elves.
Others made pop-up puppet Santas.
Others made pop-up puppet fairies.
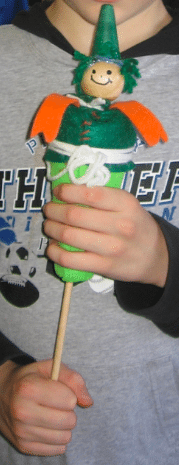
One of my favorites was a pop-up puppet man in green.
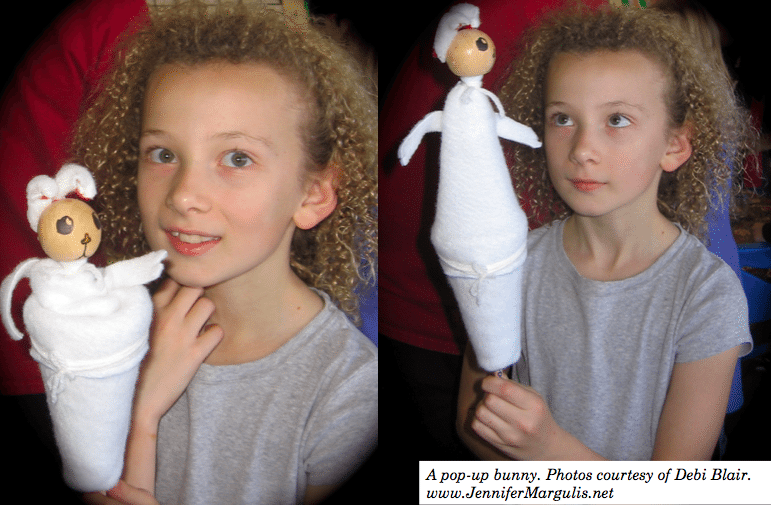
One girl decided to make a white bunny (scroll to the bottom to see a picture of her pop-up puppet bunny).
And one boy made a pop-up puppet angel with her felt puppet hands clasped together in front of her and a halo on her head made out of a yellow pipe cleaner.
This is not an easy project!
This is not a project for a mom who isn’t crafty.
But we made these pop-up puppets in my oldest daughter‘s kindergarten class and we still have her funny bald purple pop-up puppet and I thought making a pop-up puppet would be a perfect holiday activity that would yield something lasting, either to keep or give as a gift.
I was right.
This craft is totally awesome
But it’s also not so easy. (I know, I know, I already said that!)
Read no further if you want a quick DIY activity. This pop-up puppet one’s pretty involved.
What you need to make a pop-up puppet
A 12″ wooden dowel
A large wooden bead to use as a doll’s head
A cardboard cone (these are used for wool and cotton and available at weaving stores. You can also buy them very cheaply (between .35 – .50 cents/cone) on line here or find them on Amazon.
Fabric for the cone
Felt for the body and the hands
Fabric scraps to use as decoration (optional)
Needle and thread
Yarn
Tacky glue
Permanent markers
The cones I finally managed to get my hands on looked like this:

We had to cut off the bottoms to enlarge the holes.
That was perfect because the cut off bottom tips were just the right size to use for elf and Santa hats!
We bought dowels in packages of 10, like these on Amazon, because we were doing this project with a large group:
We bought wooden doll heads in packages of seven. These cost us $3.99. You can also buy doll head knobs on Amazon.
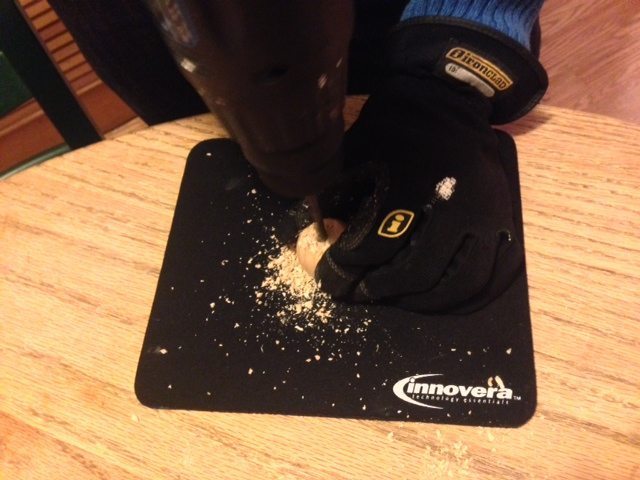
The first thing we did was to use a 1/4 inch drill bit to drill a small hole (3/4 inch deep) in the end of the wooden beads.
The safe way to do this would be to put the bead in a vice.
We don’t own a vice.
We used gloves and a mousepad and a firm grip instead.
You drill like this:
The drilled head looks like this:
Once the holes were drilled we crammed the heads onto the sticks.
The fit was perfect and we didn’t need to use wood glue.
A dollop might not hurt.
But the Romans made their buildings without cement.
Why not us?
Make paper patterns
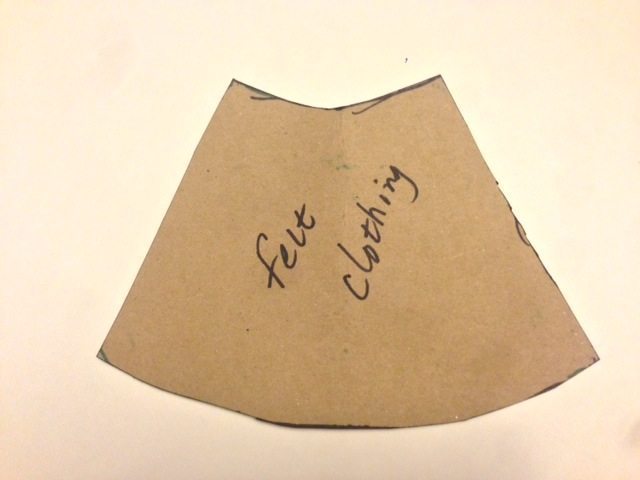
Then we made two patterns out of paper (and then transferred them onto cardboard):
1) A cone pattern (for the fabric to wrap around the cone. This will be the bottom part of the puppet.)
2) A felt pattern (for the upper half of the puppet. This must be made of felt or another stretchy fabric—you can find other on-line tutorials that use cut up tights for this section. That seems like a smart, no-sew method, though it may be a bit pricey. Speaking of pricey, if I had all the money in the world, I would use WOOL FELT instead of synthetic nylon felt. Much more ecological and wholesome. It’s easier to be wholesome when you have all the money in the world.)
The felt pattern:
Green felt.
I cut a ton of green and red felt.
Guess what color most kids wanted?
Guess which color Jennifer did not pre-cut? WHITE!
(I advise you to pre-cut lots of white.)
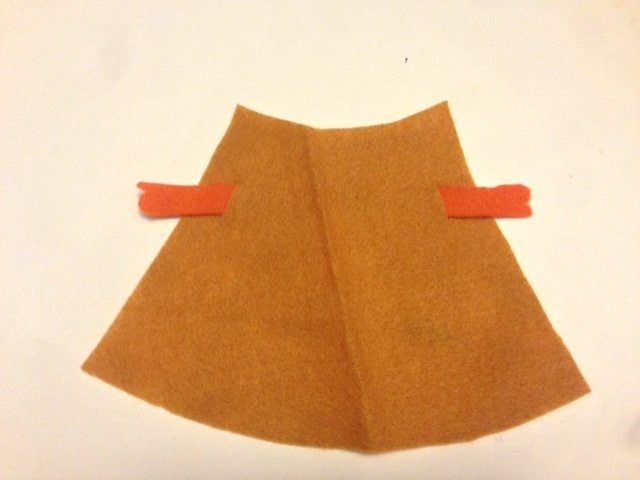
After you cut the felt you will want to make a slit in it on both sides for the arms.
Our slits were really not in the right place.
So I can’t tell you how to do this.
But here’s an approximation of what it should look like, along with the arms stuck in:
We cut out the felt for the kids but did not cut out the cone pattern in advance.
It was super fun for them to lay the cone pattern on the fabric of their choice, trace it with a marker, and cut it out themselves.
If you’re crafty you’d trace the pattern with chalk.
As I’ve already mentioned twice, I’m not so crafty.
But I think a Sharpie probably works better with kids anyway because it’s easier and makes thicker lines for them to cut along.
Okay.
Did you get all that?
You still with me?
We haven’t even started making the puppets yet!
But now we’re ready, steady, spaghetti. Except you’re not because your eyes glazed over about five paragraphs back and you surfed away to some internet por-, I mean, a page with nicer photographs by someone who actually knew what she was talking about…
A step by step guide: How to make the pop-up puppet
Step 1: Write your name and the date on the end of the wooden stick with a permanent marker.
Step 2: The puppet’s head
1) Decide what you’re making: An elf? A Santa? A fairy? Our class, as mentioned above, made bunnies, angels, fairies, a green guy, Santas (most popular choice), and elves.
Someone talked about making a reindeer but she decided she didn’t want to get her hands gluey…
I’d like to make a pirate someday, like these hearties from My Wooden Toys:
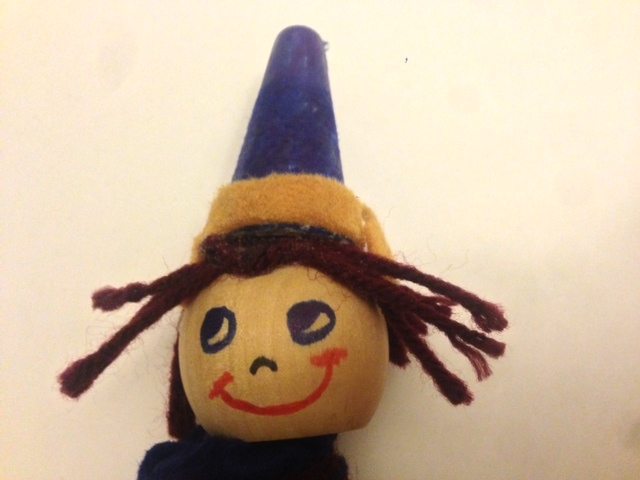
2) Draw a face on the wooden head with a permanent marker.
3) Color and decorate the hat, if your puppet is going to have one.
4) Wrap yarn around two fingers and cut at both ends. Insta-hair! Glue it on. Get fancy and trim some bangs.
5) Glue the hat onto the head. Use a lot of tacky glue so it stays on.
The glue will dry clear.
Or if you have embraced the 21st century and you own a glue gun, you can do it instantly with this.
I have come to have a new appreciation for the power of a glue gun. Four kids. One glue gun, which we use all the time. I would go so far as to say that a glue gun and glue sticks are an excellent investment for any family. That was an aside. Back to the puppet.
Set the head and stick aside to dry while you work on the rest of the puppet…
Step 3: The cone (this is the puppet’s lower half):
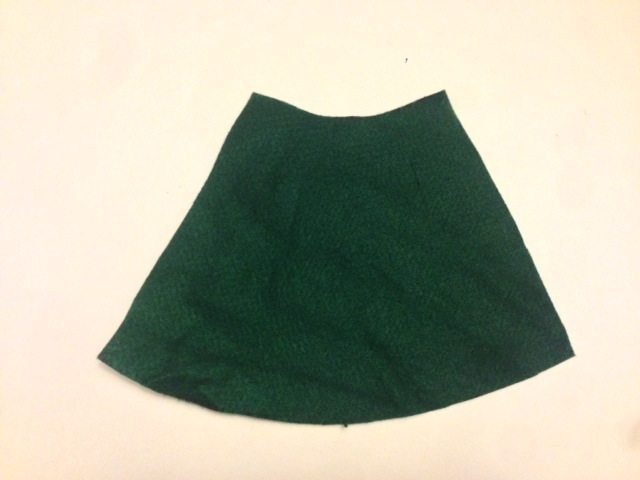
1) Choose the fabric you want to use (for an elf you may choose green or a bright color. For a Santa you probably want to use white)
2) Trace the cone pattern onto the fabric with a Sharpie
3) Cut out the fabric
Here comes the tricky part (because up until now this has all been so easy, right?):
4) Glue the fabric to the cone with tacky glue. This is easiest to do if you put the glue on the fabric, put the cone in the middle (with fabric to spare on the top and bottom) and roll first one side of the fabric onto the cone and then the other.
We made the pattern long and tucked the tops and the bottoms into the cone with lots of glue on them too.
We also folded the final edge of fabric and tucked it under itself (like when you wrap a present) for a neat seam.
Step 4: The puppet’s top half (this is the pop-up part!):
1) Thread felt arms through the top of the felt cut-out and sew them on (an X pattern works well). I suppose you could also glue on the arms, but only glue the middle so the arms themselves can move.
[Optional: decorate this top felt by gluing on or sewing felt buttons. In my son’s Santa above he cut out little white buttons and glued them on]
2) Sew the two ends of the felt together using an overhand stitch. There’s probably a craftier way to do this so the seams don’t show. But this is something even kindergarteners can do themselves and it worked great.
Now you have the three parts of the puppet:
1) the head
2) the cone
3) the upper body
And you’re ready to put it all together.
You’re almost there.
The assembly is the hardest part to get the hang of but the most satisfying.
And if you have one of those aforementioned miracles of a hot glue gun, this step is easy peasy.
If not, expect to get a lot of tacky glue on your hands.
Step 5: Assemble the puppet:
1) Glue bottom of the felt to wide end of the cone using tacky glue. Use a lot of glue. This will be a little messy. Make sure the seam is in the back. Unless you want the seam in the front. One boy did. And it looked really cool. Like a coat.
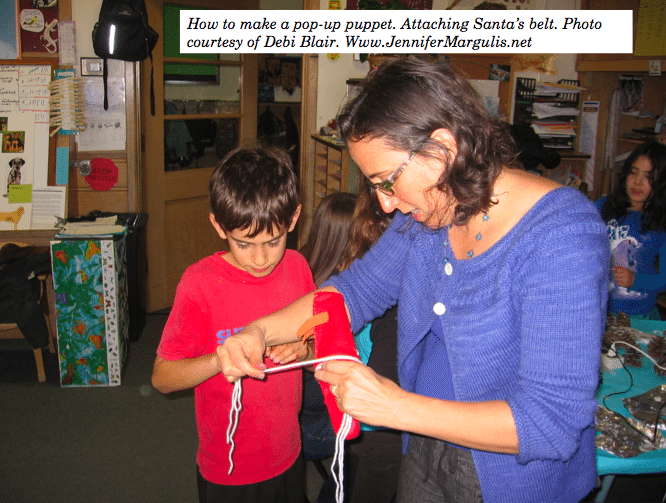
2) Wrap yarn around the waist for a belt. This yarn serves two purposes: 1) it looks cool, 2) it keeps the felt on the cone while the glue is drying.
3) Insert the now dry head-on-a-stick into the body. I found this a little counterintuitive, as did some of the kids. The narrow part of the cone is the puppet’s feet. It would be better if I had a picture to show you but my hands were way too gluey and I was way too busy helping kids to take any photos.
You’re almost done!
Wipe sweat from brow.
And then…
4) Glue the narrow end of the felt to the underside of the head. Now it’s time to “choke” your puppet with yarn. That is, wrap yarn tightly around the puppet’s neck.
This creates a fetching collar (you can color coordinate with the belt) and also keeps the puppet’s clothes on its body!
Finally, aka last but not least: Allow the glue on the puppet to dry thoroughly before you play with it.
Ta dah!
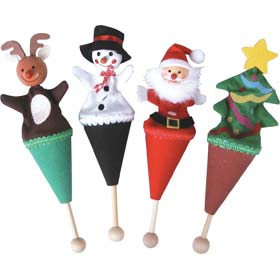
If you look on-line, you can find lots of awesome examples of pop-up puppets for inspiration. Like these:
And these:
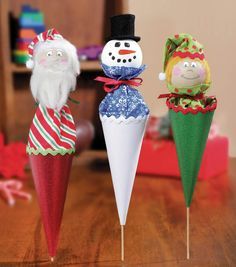
Published: December 17, 2013
Last update: April 8, 2021
Other fun stuff to do with kids:
Play Interview! (See #5 on this list.)
Quality time with kids in the kitchen
Make Norwegian flat bread



These are so cute. I have one here at the house, but several grandchildren here at one time. Thought about making some. Did the dowels have the ball at the end or did you glue some on?
Thanks for stopping by Carolyn. I hope you make them with your grandchildren! Our dowels didn’t have balls at the end like the “professional” puppets. We didn’t glue dowels on. They work just great as is. But I suppose you could find dowels with rounded bottoms? Or glue a smaller ball on. Though with the wear and tear (kids LOVE to play with these) I suspect it wouldn’t stay on for long. Does that help? After you make them, check back and let us know how it went!
Thanks for this article! I remember making these in grade school. I loved them. I’d like to make them with a class of 40 grade 4 students (with 3 teachers). How long did they take each student to make when you did it? Thanks!
I think that will be super fun, and I encourage you to make sure you have some parent volunteers to do this with 40 students (also we got a lot of the supplies from community donations. It’s amazing what people have in their closets!). The whole project, with all the stations, took us about 2 and a half, maybe even 3, hours.